We've been planning to give our bedroom a makeover since we completed our big extension in 2014.
We made a start during the end of last year, but Christmas got in the way so it's been a bit of a slow project, which we are hoping to get finished in the next few weeks.
Before I do the big reveal, I thought I'd share the look I'm hoping to achieve and some of the things that have inspired me. I've included a few images from Pinterest that I love. Check out my Pinterest board for more of these.
A calming colour palette
I love calming neutral colours, especially in our bedroom. I also really love all the grey tones that are around at the minute. In fact quite a few of the rooms in our house include some grey.
A luxurious but cosy feel
I want our bedroom to have a grown up look to it, which is quite luxurious but also cosy too. I'm thinking: a soft, plush carpet, which feels lovely and soft when you step out of bed in the morning; a fabric headboard, which will be the main feature of the room; lots of cushions to make it super cosy; big bedside lamps like you get in hotels; lovely bedding that you want to sink into; and to add that extra luxurious touch, a hint of crystal (lights, curtain pole etc.) and lots of luxurious finishing touches.
Minimal furniture and clutter
Our bedroom is actually quite small and now we have a dressing room, I'm keen to ensure we keep furniture and clutter to a minimum to make the room feel larger.
A bigger bed
We've always had a double bed, but now we've got three little munchkins who often like to join us first thing in the morning, a bigger bed is a must.
I'm looking forward to finally getting our bedroom finished. I'll share the final results with you as soon as we've done.
J x
A couple of weeks ago we began to redecorate our spare room so that we could use it as a dressing room. As you can imagine I'm VERY excited about the prospect of having a dressing room, even it is very small!
With having three young children,we don't have much spare time, so we're doing the dressing room in phases over a few weekends. Phase One was actually painting the room, which has made such a difference already- read about it and see some before shots here.
Last week we had the new carpet fitted and it really makes such a difference. We've chosen one that's got quite a thick pile, so it feels nice and luxurious on your feet.
I've tried to get some pics, but due to the room being small it's quite difficult and the carpet appears darker than it actually is, but hopefully you'll get the idea.
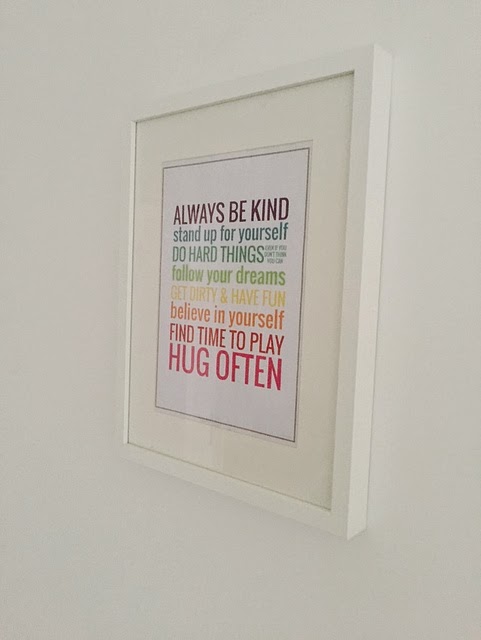
I've also started picking up little accessories when I see them. These candles were from a friend and I've had them in my bedroom for a while. However, they really fit well in here, so I've moved them. I saw the photo frame when I was shopping in Tesco and at £2, it would've been a crime not to pop it in the trolley!
We're planning to get the furniture at the weekend. We're heading to Ikea and the plan is go with mirrored Pax wardrobes to make the space seem bigger and a Malm dressing table. The biggest challenge will be to not kill each other whilst setting it up. Hubby and I don't have a great history of building flat pack furniture together - why do men insist on trying to do it without reading the instructions?!
As you can imagine I've been doing lots of pinning for inspiration on Pinterest. Check out my Dressing Room board for lots of ideas.
I'll keep you updated.
J x
We've finally started work on our new dressing room! Anyone who is a regular reader will know that we spent the majority of last year having a large (and stressful) extension to our house. This extension has meant that we now have five bedroom, one more than we actually need. The spare room is pretty small and rather than it becoming a dumping ground, we have decided to turn it into a dressing room, which I'm super excited about.
So excited that I've been planning what I'll do with the room for the past few months (check out my Dressing room dreams post).
Phase One of Project Dressing Room consisted of repainting the room and woodwork, which we managed to get done this weekend. The room is quite small, so with a little help from my mum and dad, we managed to get it all finished by the Sunday.
I've included some before and after pics below. It was difficult to get an after photo that accurately shows the true colour of the room (hence the slightly random pics), but I think I just about managed it. I'm really happy with the grey colour we've used (Light Rain from the B&Q Colours range) and the newly painted woodwork and radiator, give the room a fresh new lease of life.
Before
After
Phase Two is to replace the horrid (and now paint stained) carpet. I'm thinking a plush pale grey will work well. We're hoping to get this done in the next couple of weeks, so will keep you updated.
J xx
We bought our current house when Oscar had just turned 1. We knew we wanted more children and the two-bedroom house we were in was not really a family home. We were planning to have one more child, so we bought a reasonably sized 3 bed, not that far away from our first home. It was close to my parents, we had made lots of friends in the area, the schools were good and perhaps most importantly, the local pub was good!
The house was pretty dated inside, so we did a bit of redecorating to make it more our style. We even painted our spare room a lovely pale green so that it would suit any new arrival that might come along...
Just over a year after we moved in, we were delighted to find out that I was pregnant again. However, a few weeks later our life became a little more unpredictable - we discovered that we were expecting twins!
I am a planner, so it took me a while to get used to the news (I still sometimes can't actually believe we have twins!). I'm quite practical, so I soon began to think about our house. Whilst it would be fine initially, I knew that in the long term I wanted each of my children to be able to have their own room.
A few months after the twins were born we put our house on the market and began looking for somewhere bigger. We wanted to stay in the same area, but because the schools are so good larger family homes just don't seem to go on the 'market'. After a couple of months we started talking about having an extension. We had a few architects round, had some plans drawn up, got planning permission (eventually) and got quotes from a few builders. It all ran pretty smoothly, we selected a builder, checked his references, remortgaged our house and work began in January 2014, just before the twins turned 1.
Everything seemed to be going well, until we got to May. We realised that we were getting close to reaching the amount we'd been quoted for the build and yet we were no where near finishing! The builder reassured us that it was all fine. However, we took the decision to not pay them their next instalment until we thought that the build was back on track and would be completed within budget. The builder left the site! We had £5,000 left of our budget and lots to finish. Below shows what our house looked like when the builder left.
The following couple of months were horrendous. We were living in a building site with three small children, we didn't have a limitless budget to get the work finished and me and Simon argued - a lot!
We decided to take out a loan and fortunately we were able to borrow from our parents. Luckily we have a few family and friends who work in various trades, and they thankfully agreed to help us. The only downside was that during our weekends the house was full of worksmen for months on end. It was a nightmare, but at least some progress was being made and by July things started moving again.
Although work was slow and it felt never ending at the time, by October we seemed to be getting there. Our gorgeous new kitchen/diner was finished, the new extension meant we now had a large utility and downstairs toilet and what used to be our garage, which was towards the back of the house was now connecting to the house creating a large playroom and sitting area, which we call the 'snug'. Do you fancy a peek..?
One of my favourite things in our house - our handprints! We had it done when we were at Center Parcs. The twins were only 5 weeks old.
Our utility room, which is home to our super duper large washer and dryer - these two make my life so much easier!
My £6 bargain from Home Bargains!
Finally a downstairs toilet!
Our 'snug'. We still need to add to this as I think it needs another chair or perhaps a footstool? What do you think?
My favourite photo of Oscar. He was 6 months old when this was taken.
Our playroom. Finally we could move everything out of our lounge! I wanted it to be very bright and colourful, so we went for a lime green carpet and I love this button rug from Ikea. Admittedly our playroom is still a bit of a work in progress. I need to buy some more storage units - I've got my eye of the Stuva range from Ikea. I've also been pinning lots of ideas on my Pinterest board, which you can check out here
As part of the extension we also had two new bedrooms, which I promise to show you in another post. Along with new windows at the front of the house (I hated the diamond leading we had) and a slight large entrance hall with a new front door.
So, although last year was pretty horrid at time, it was completely worth it. I love out new house, particularly our kitchen/diner area, which is so prefect for our family and is also the perfect space for entertaining friends.
I hope you like it. I'd love to hear what you think...
J xx